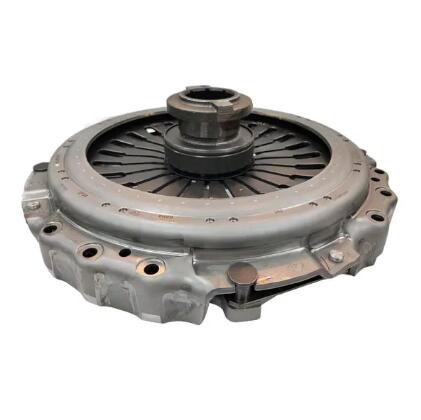
Installing the Mercedes Benz Clutch Kit 0212502101 – A Step-by-Step Guide
2024-08-09
Installing the Mercedes Benz Clutch Kit 0212502101 requires careful attention to detail and the right tools to ensure a smooth and successful process. Whether you’re a seasoned mechanic or a dedicated DIYer, following these steps will help you achieve optimal results. Here’s a comprehensive guide on the recommended installation process and the tools you’ll need.
1. Gather the Necessary Tools
Before starting the installation, make sure you have the following tools and equipment:
- Jack and Jack Stands: To lift and secure the vehicle.
- Socket Set and Wrenches: For removing and securing bolts.
- Clutch Alignment Tool: To ensure proper alignment of the clutch disc.
- Torque Wrench: For precise tightening of bolts to manufacturer specifications.
- Screwdrivers: For any additional fastening or adjustments.
- Transmission Jack (Optional): To support the transmission during removal and installation.
2. Prepare the Vehicle
1. Secure the Vehicle: Use the jack to lift the vehicle and place it on jack stands. Ensure the car is stable before proceeding.
2. Disconnect the Battery: For safety, disconnect the battery to avoid any electrical issues while working.
3. Remove the Old Clutch Assembly
1. Remove the Transmission: Carefully support the transmission with a jack or transmission jack. Disconnect the drive shafts or axles if necessary, then remove the transmission bolts and carefully slide the transmission away from the engine.
2. Remove the Clutch Components: Unbolt and remove the old clutch assembly, including the pressure plate, clutch disc, and release bearing. Note the orientation and position of each component for reference.
4. Install the New Clutch Kit
1. Inspect the Flywheel: Before installing the new clutch, inspect the flywheel for any damage or excessive wear. It’s recommended to resurface or replace the flywheel if necessary to ensure a smooth surface for the new clutch.
2. Install the Clutch Disc: Align the clutch disc with the flywheel using the clutch alignment tool. Ensure that it is positioned correctly to avoid any misalignment issues.
3. Attach the Pressure Plate: Secure the pressure plate over the clutch disc and flywheel. Use the appropriate bolts and torque them to the manufacturer’s specifications using a torque wrench. Follow the recommended tightening sequence to ensure even pressure distribution.
4. Install the Release Bearing: Attach the release bearing to the clutch assembly, ensuring it is properly aligned and seated.
5. Reassemble the Transmission
1. Reinstall the Transmission: Carefully slide the transmission back into position, aligning it with the clutch assembly and engine. Secure the transmission with bolts, and reattach the drive shafts or axles if they were removed.
2. Reconnect the Battery: Once everything is reassembled, reconnect the battery.
6. Final Checks
1. Test the Clutch Pedal: Before driving, test the clutch pedal to ensure smooth engagement and disengagement. Check for any abnormal noises or issues.
2. Test Drive: Take the vehicle for a test drive to ensure the clutch operates correctly under real driving conditions. Pay attention to the performance and make any necessary adjustments.
By following these steps and using the recommended tools, you can ensure a successful installation of the Mercedes Benz Clutch Kit 0212502101. Proper installation is crucial for maintaining optimal performance and longevity of your clutch system. If you’re unsure about any part of the process, consulting a professional mechanic is always a good option.


